Learn how to get an online printing quote quickly and with minimal effort, using Newprint’s online price calculator.
Are you tired of submitting your inquiries via email? And having to wait for hours to have the information you need?
We know the decision-making process can be complicated even when you have all the relevant information. And sometimes, a timely decision is crucial. This is why we have a real-time price calculator on our website for every product. This allows you to get your online printing quote quickly and with minimal effort. In most cases, you will be able to get the final price for your product. Only if you have a special request will you have to email us and wait for our assessment.
Steps to get an online printing quote
1. Choose the product
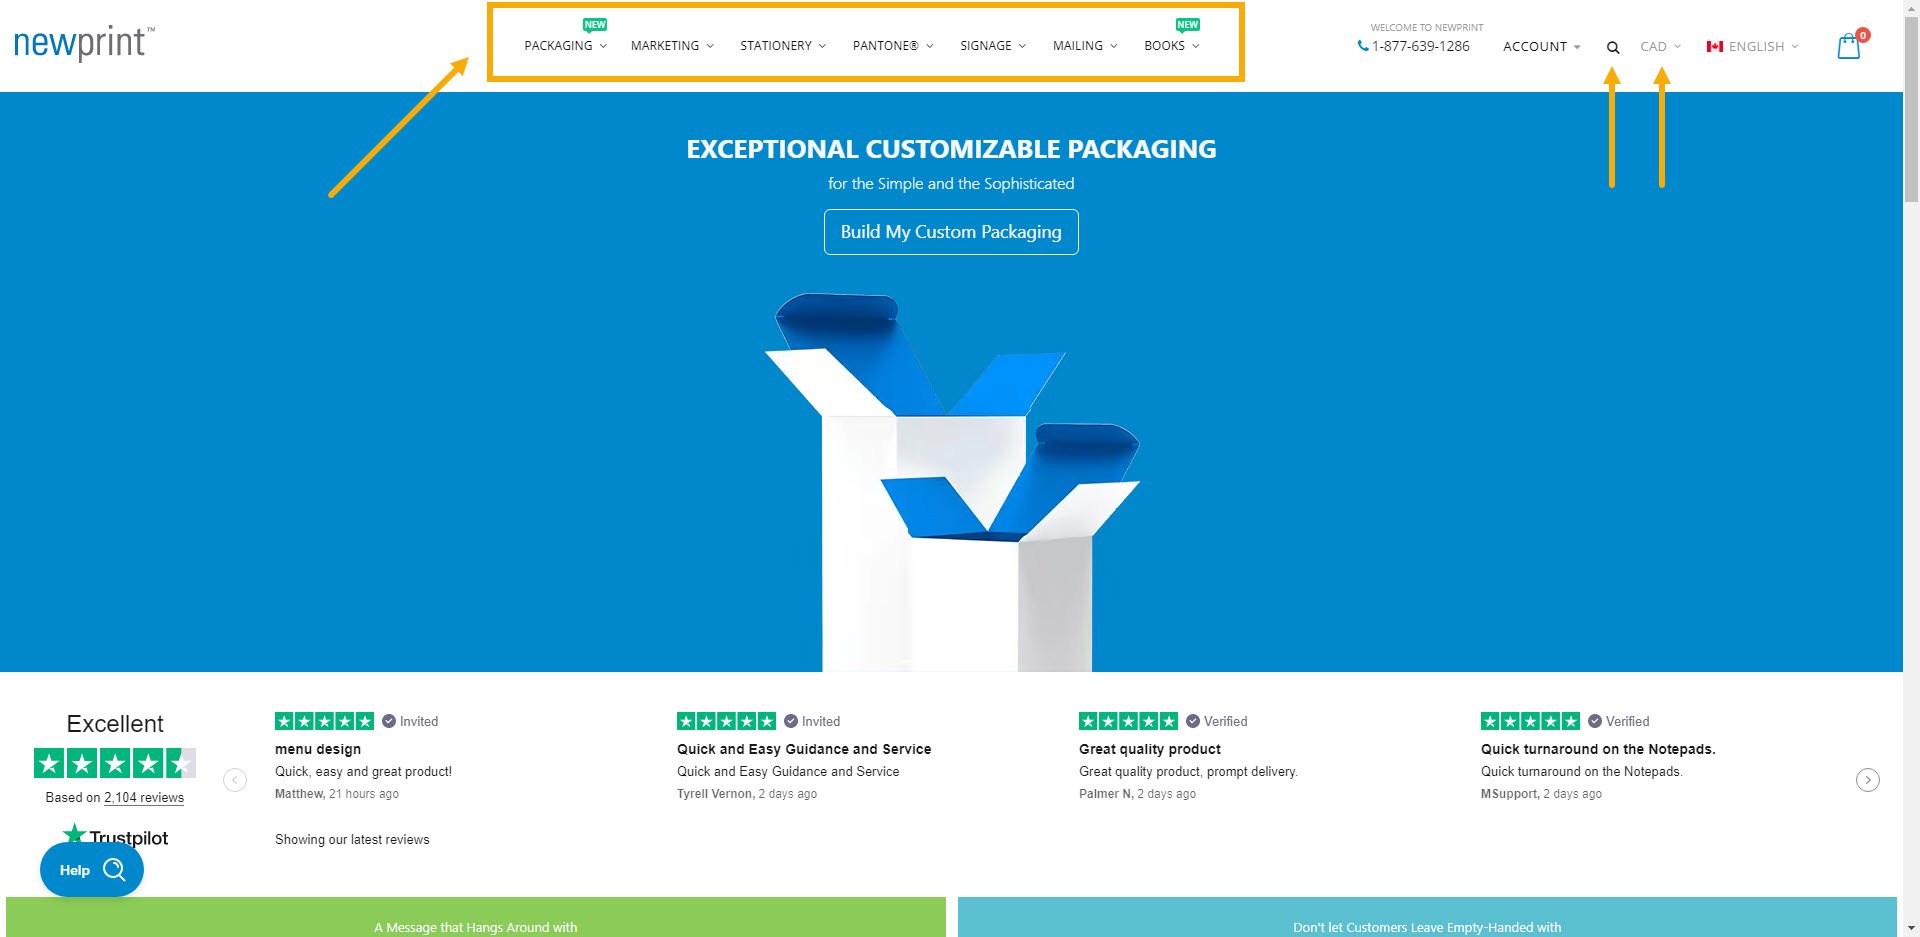
First things first. You have to choose your product. When you visit our website, you can see available categories in the top middle section of the screen. When you hover over any main categories, you can choose the product you need from the drop-down menu.
Note: If shopping on our .ca domain, you can choose between CAD and USD. If you are on our .com domain, the only available currency option is USD. You can also search the products by activating the search bar at the top of the screen.
2. Choose the binding
For our example, we will guide you through getting an online book printing quote. But, whatever product you choose, our ordering process is intuitive and easy to follow.
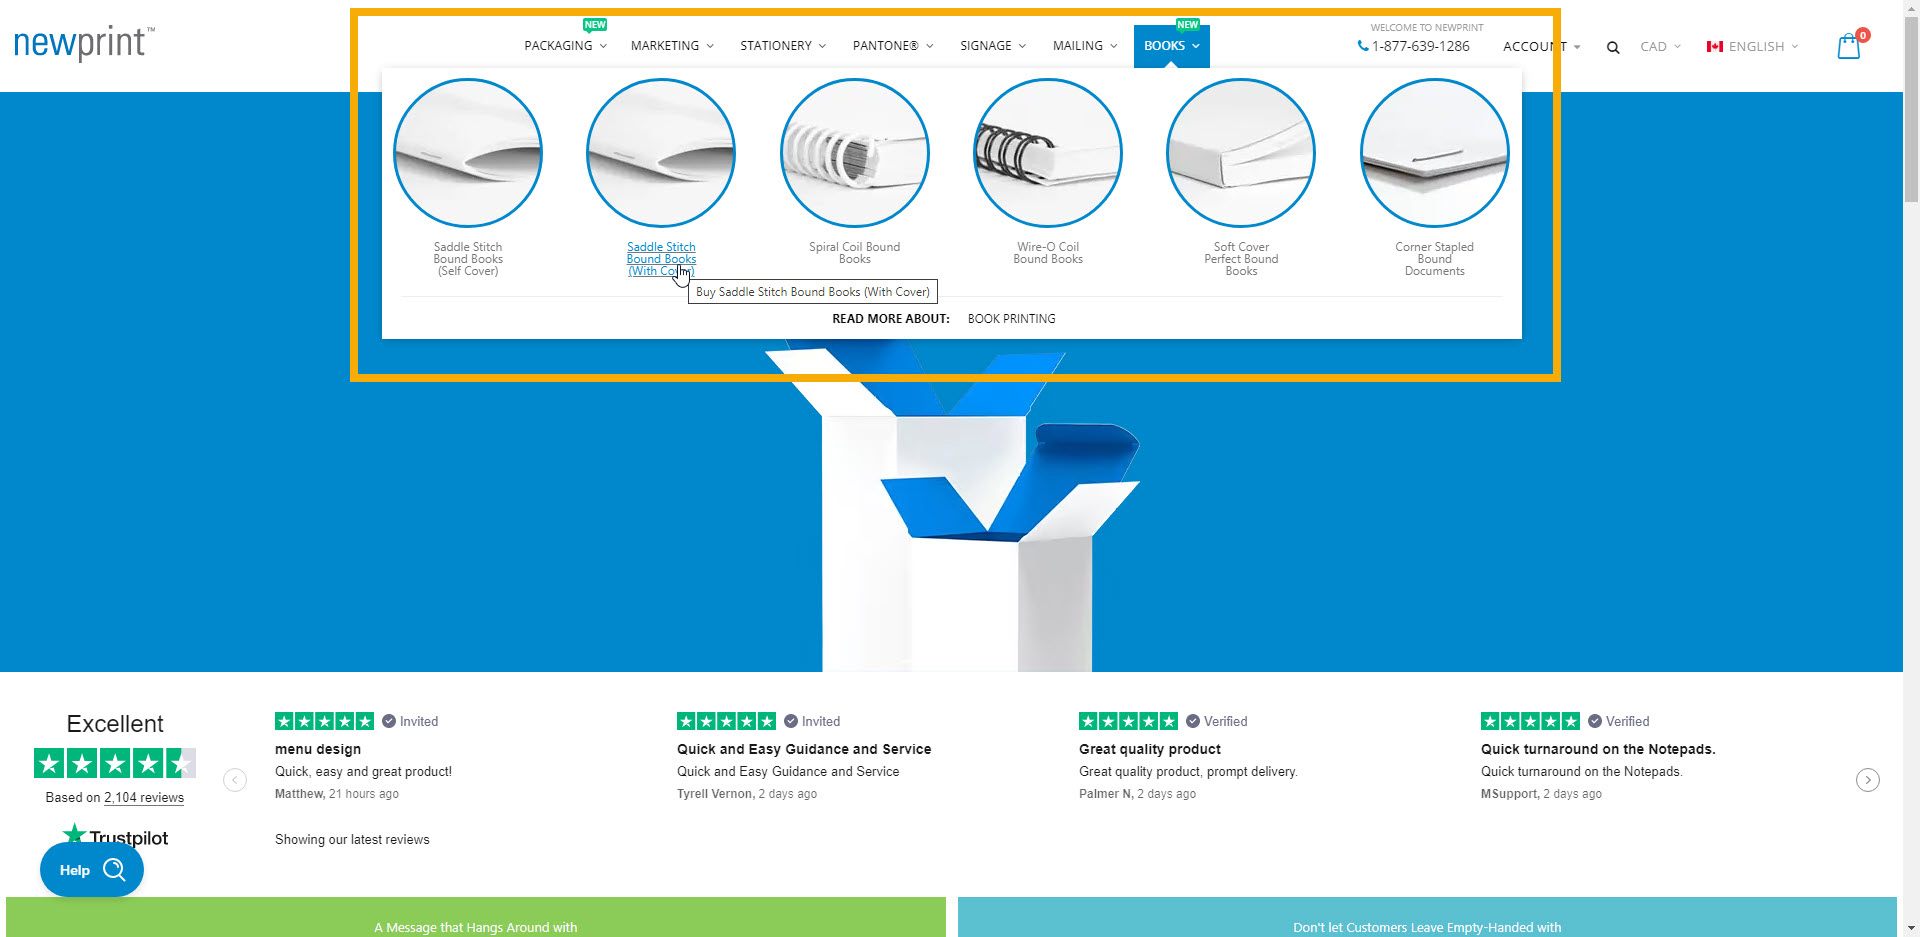
Let's get back to our example. Once you choose the product - books, the next step is to select the binding type. You can read more about any of them in the description on the product page, or if it is easier for you to have them all in one place, read our book-binding type blog post. This step is only specific to books, other products don’t have binding.
3. Select the options
The third step is to choose among the available options for paper, book size, number of pages, coating... These options are different for different products. But, the choices are mostly self-explanatory, so you should have no problem doing it. If you experience any difficulties during the process, you can see short explanations or contact our team to help you. We have both blog posts and help articles on different topics you can use as a resource.
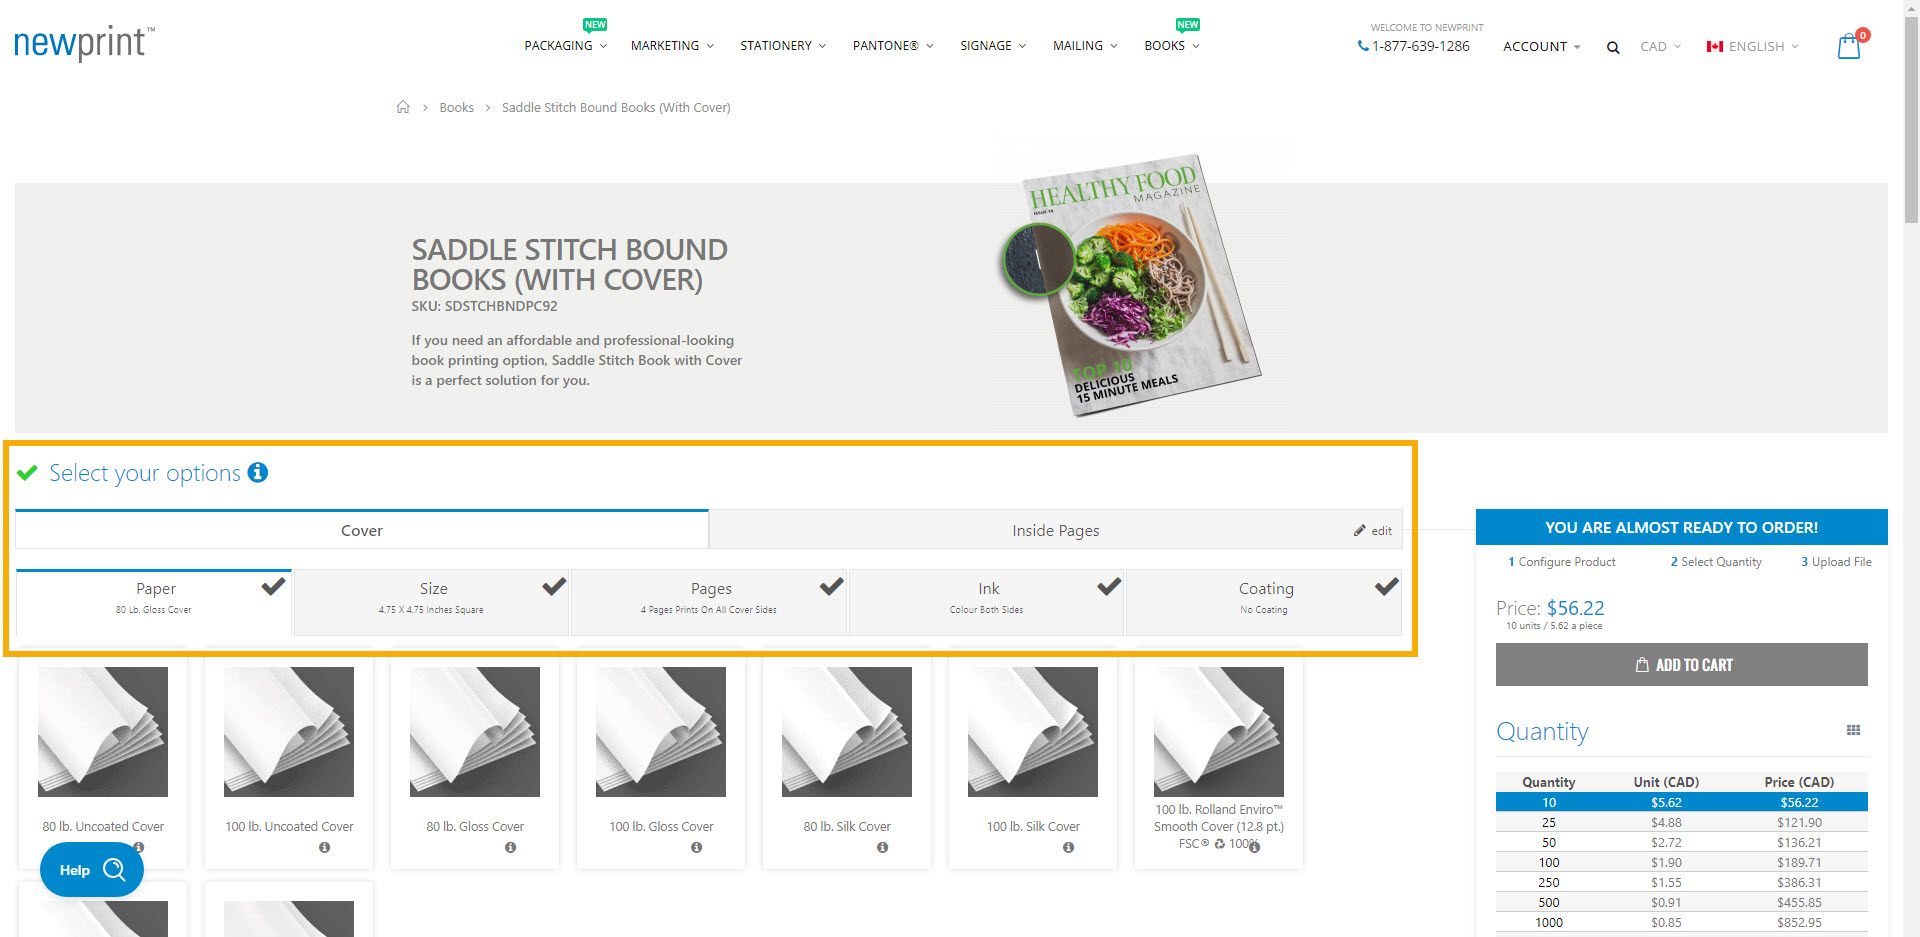
One thing specific for books is that you have to choose options for both the cover and the inside pages.
4. Confirm your choices
In this step, you will see the overview of your selected options. Make sure you check everything is correct before moving on to the next step. If you need to make any changes, choose the "edit" option.
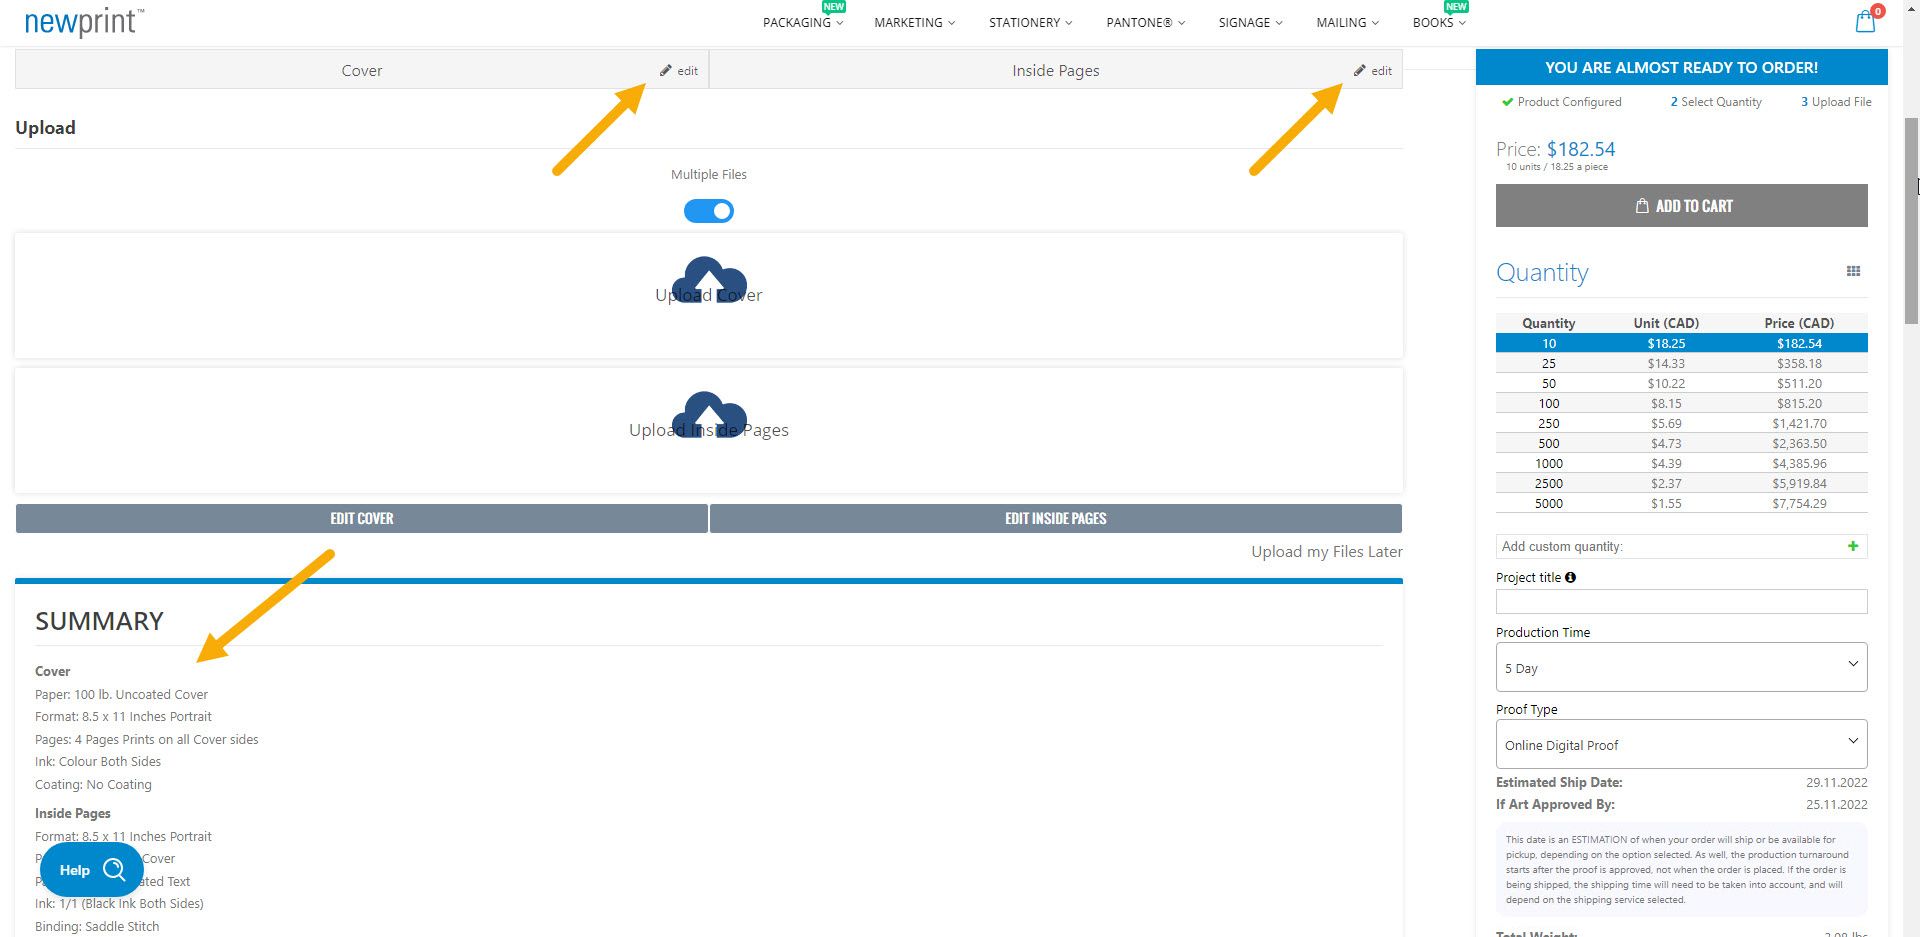
5. Choose the quantity
To be able to choose the quantity, you need to click on the desired quantity in the price calculator. Even if the quantity you want seems selected by default, the system will not let you proceed until you do it.
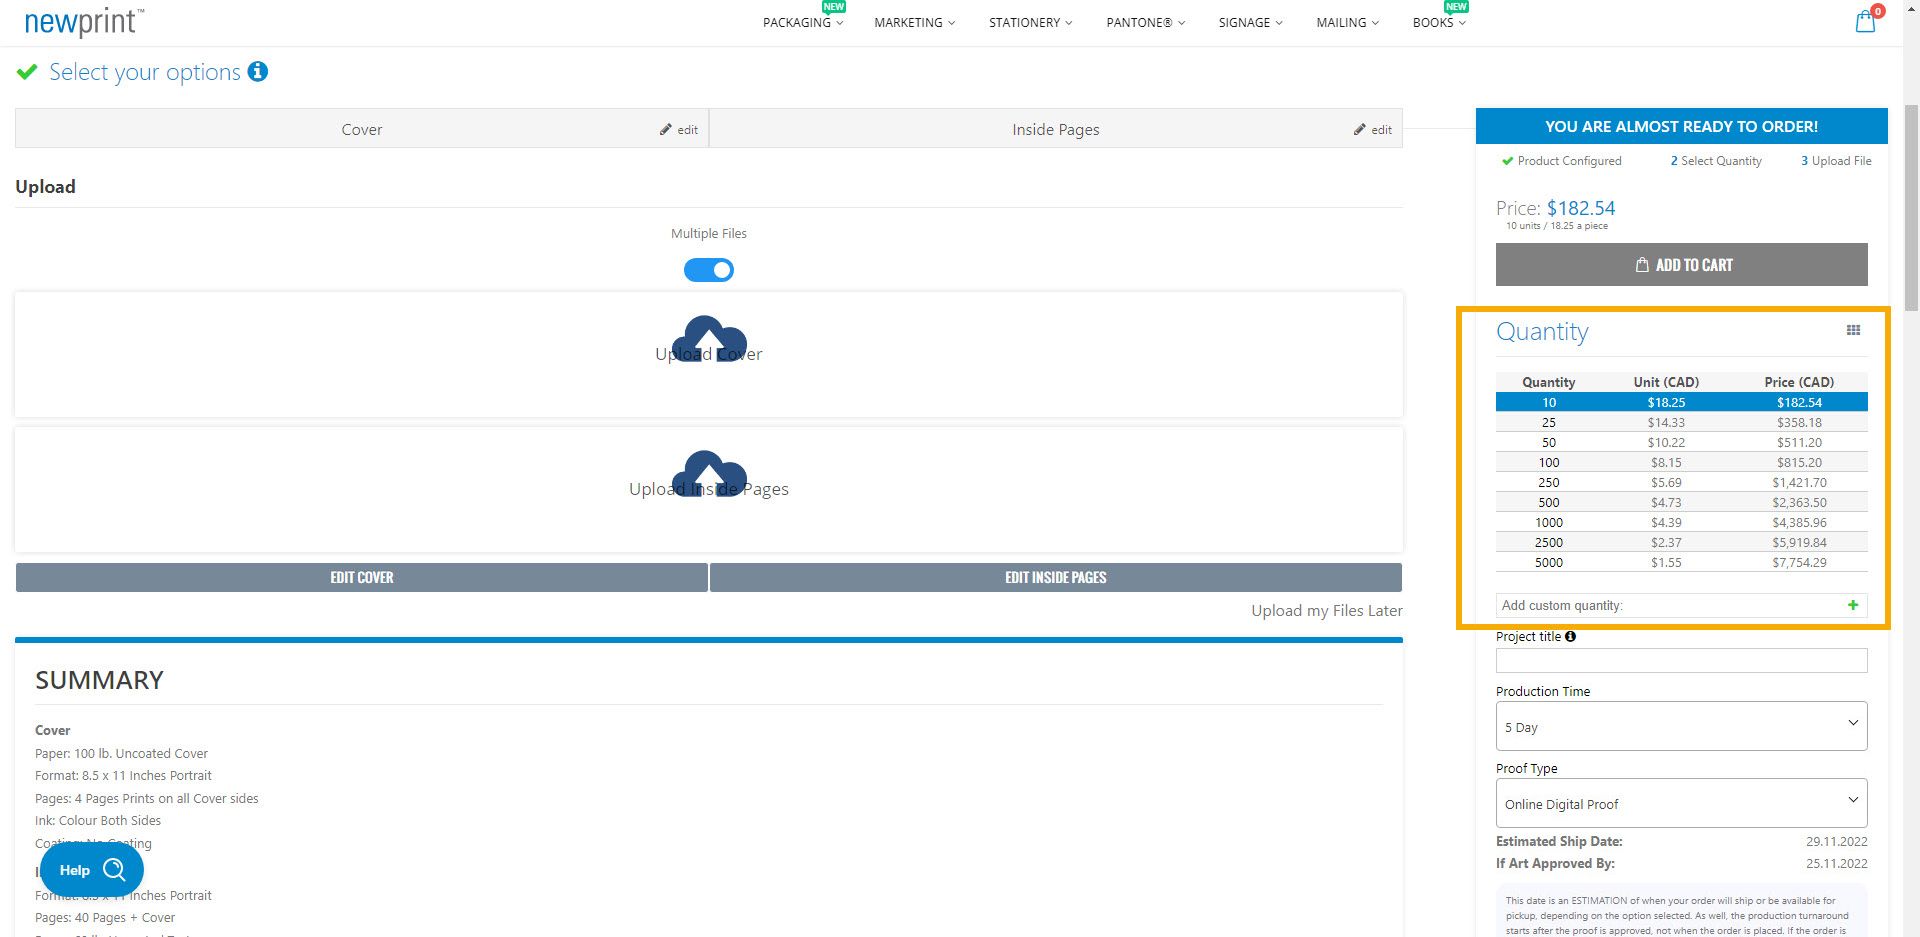
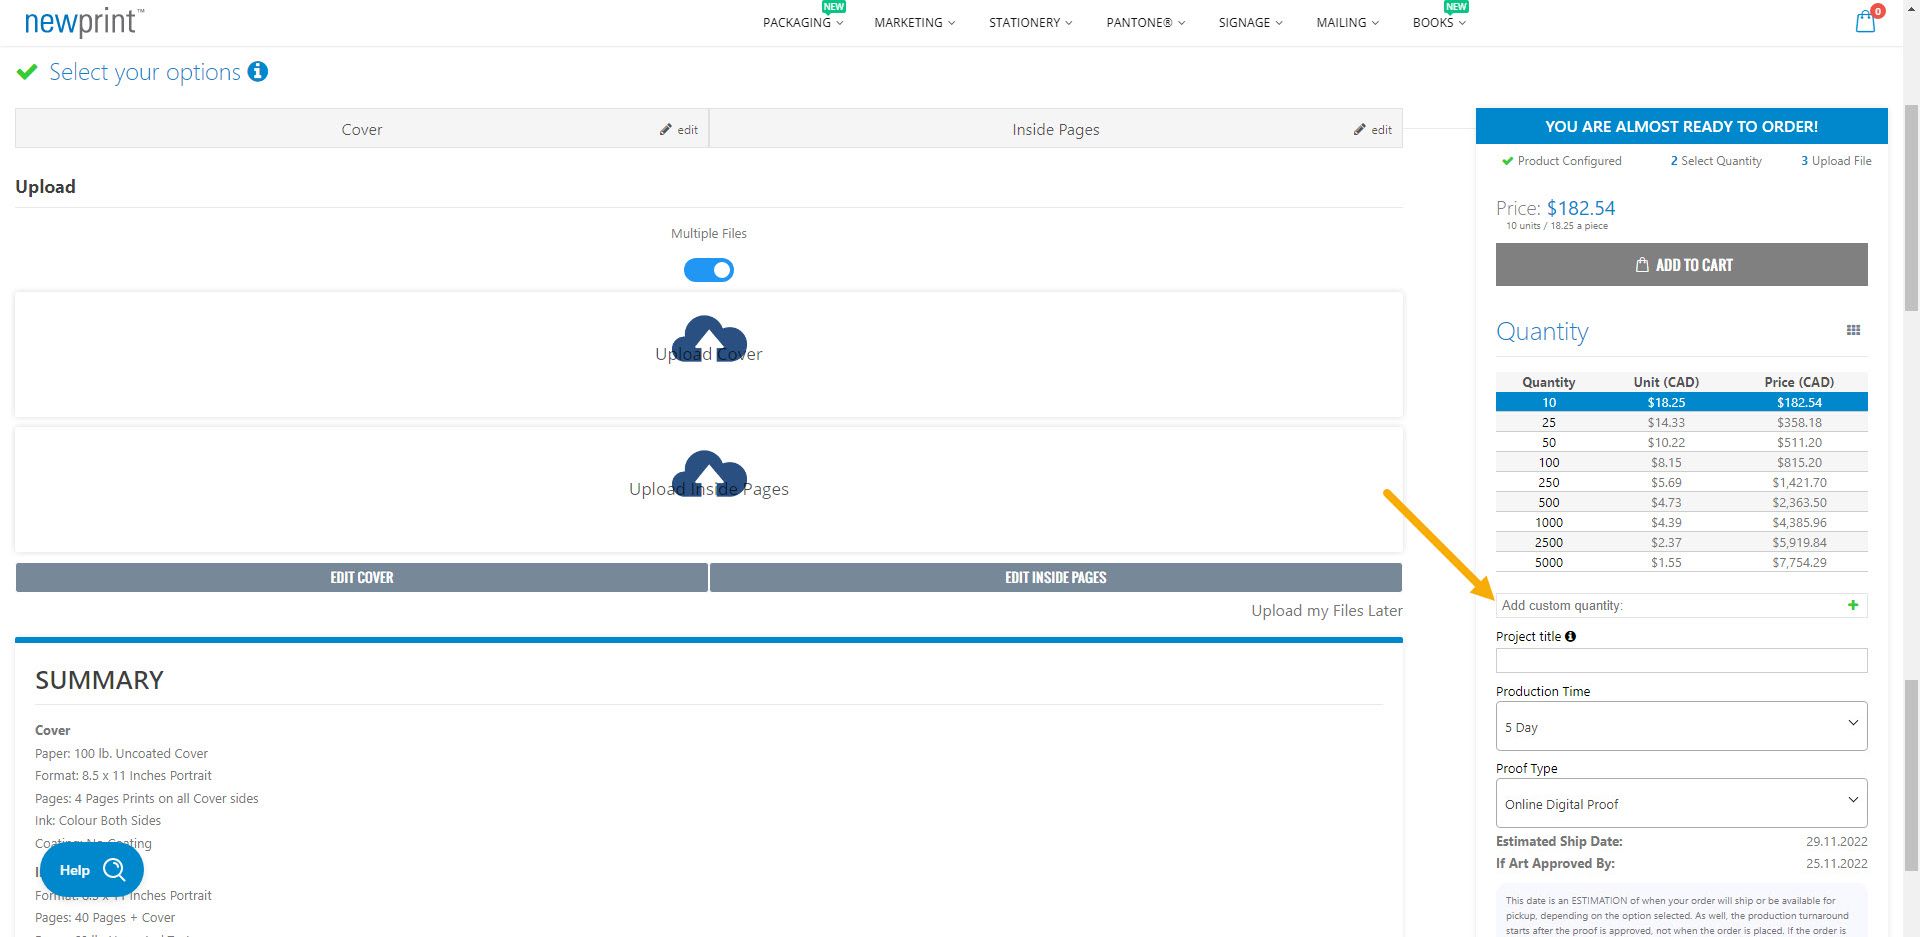
You can select your print quantity in two ways. You can click on one of the options already available in the price calculator or type in the custom quantity you need in the field below the table. In case you need to add custom quantity, you would first type in the desired number and then click the green ‘plus’ button. The table also gives you a quick overview of the price changes for different quantities.
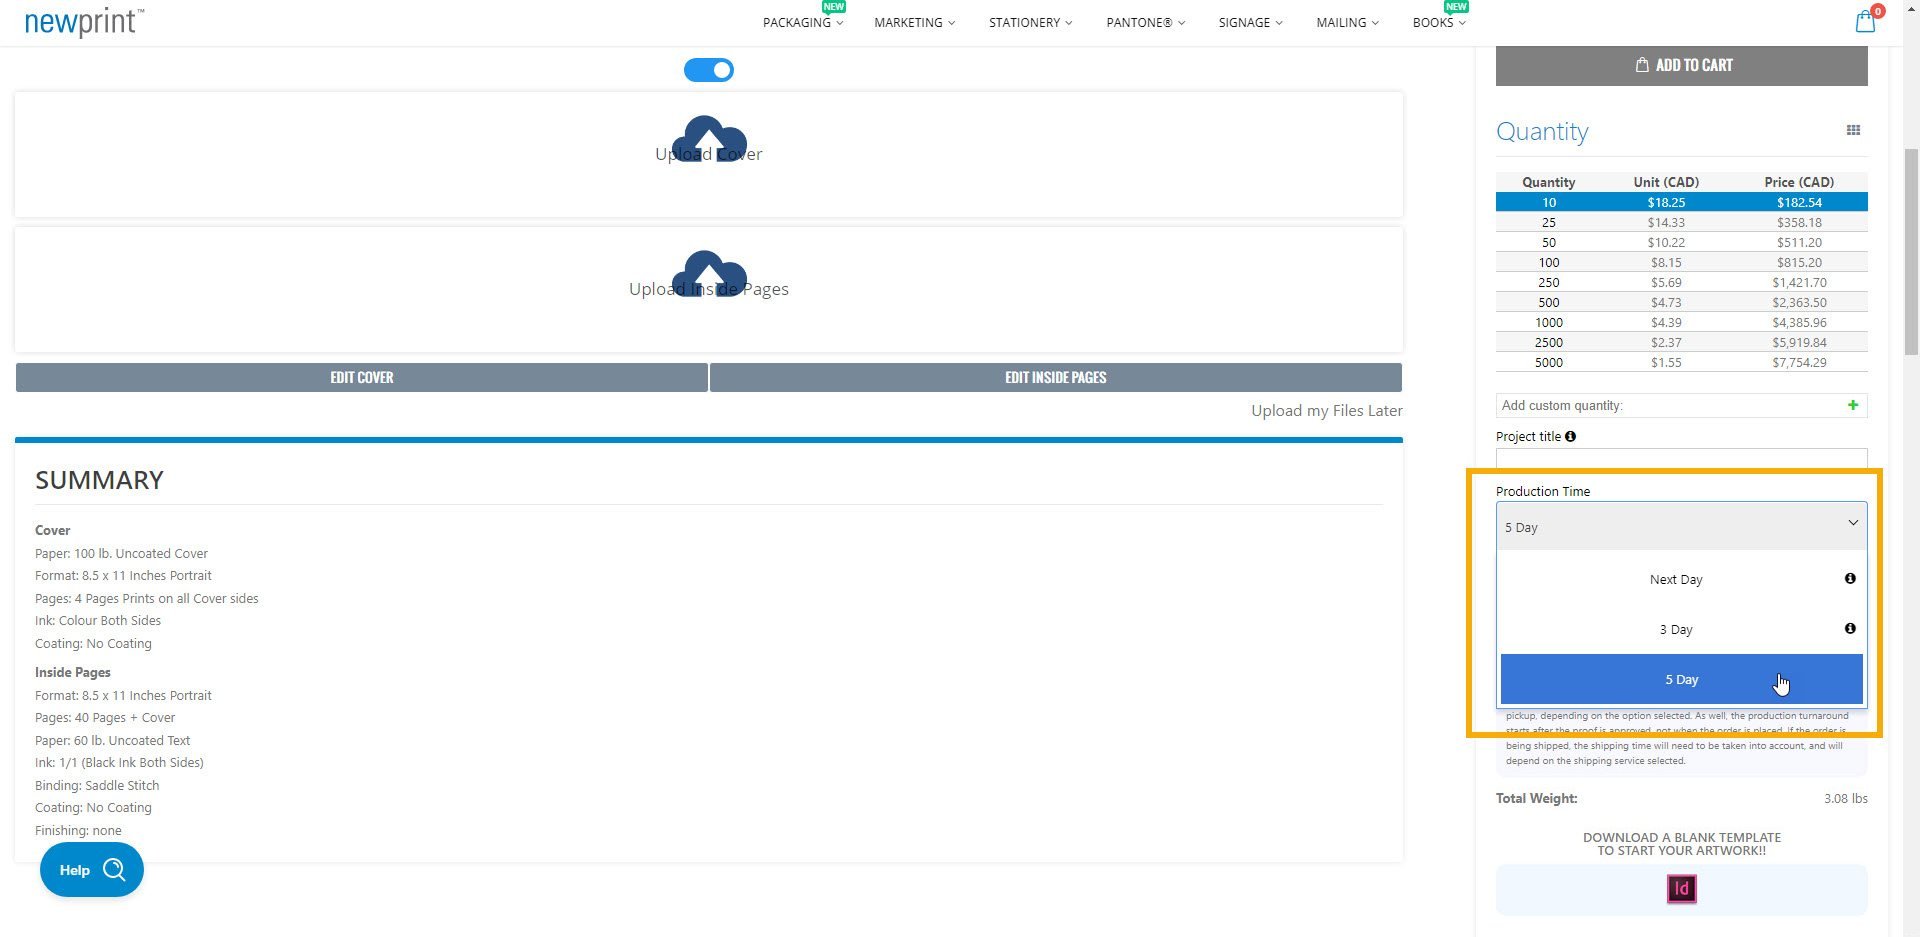
6. Choose the production time
You can choose the production time that best reflects your needs in this step. Make sure you note that turnaround time begins after the proof is approved and does not include shipping or mailing times. This means you also have to consider these when planning delivery time.
7. Decide the kind of proof you need
Make sure you understand every option before you make your choice. The most common proof type is digital proof. But if you need hard copy proof, you can choose that in this step.
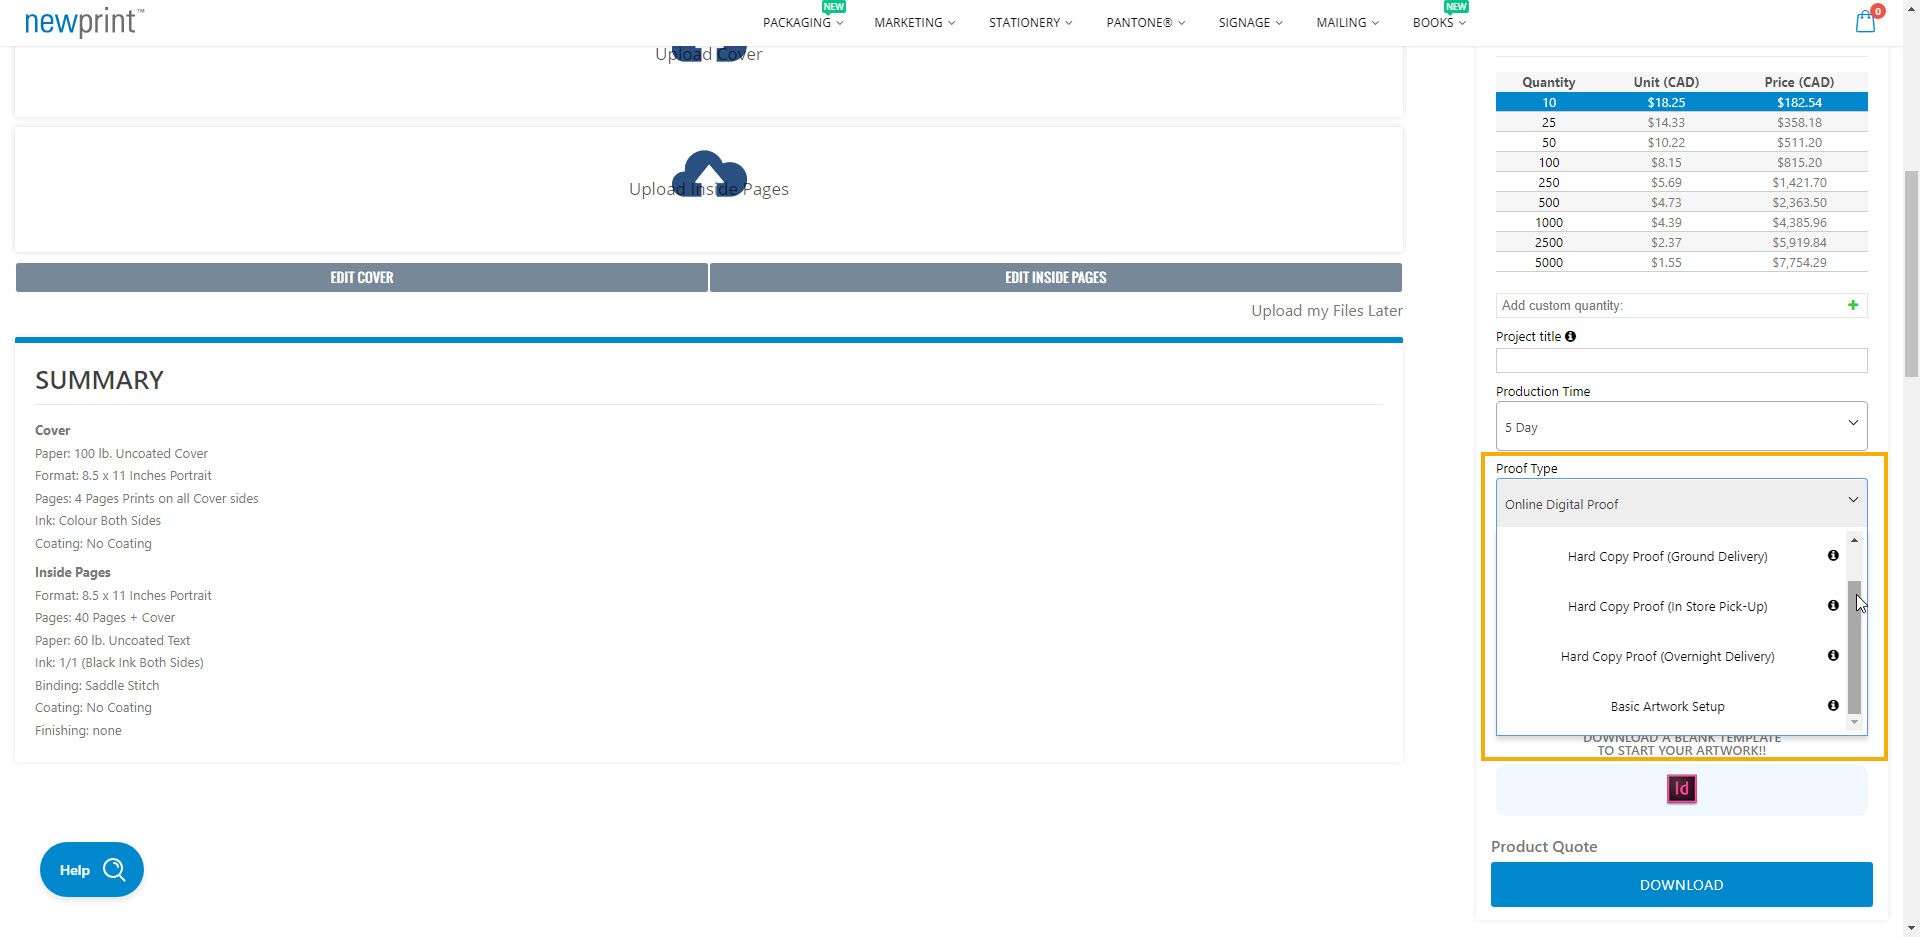
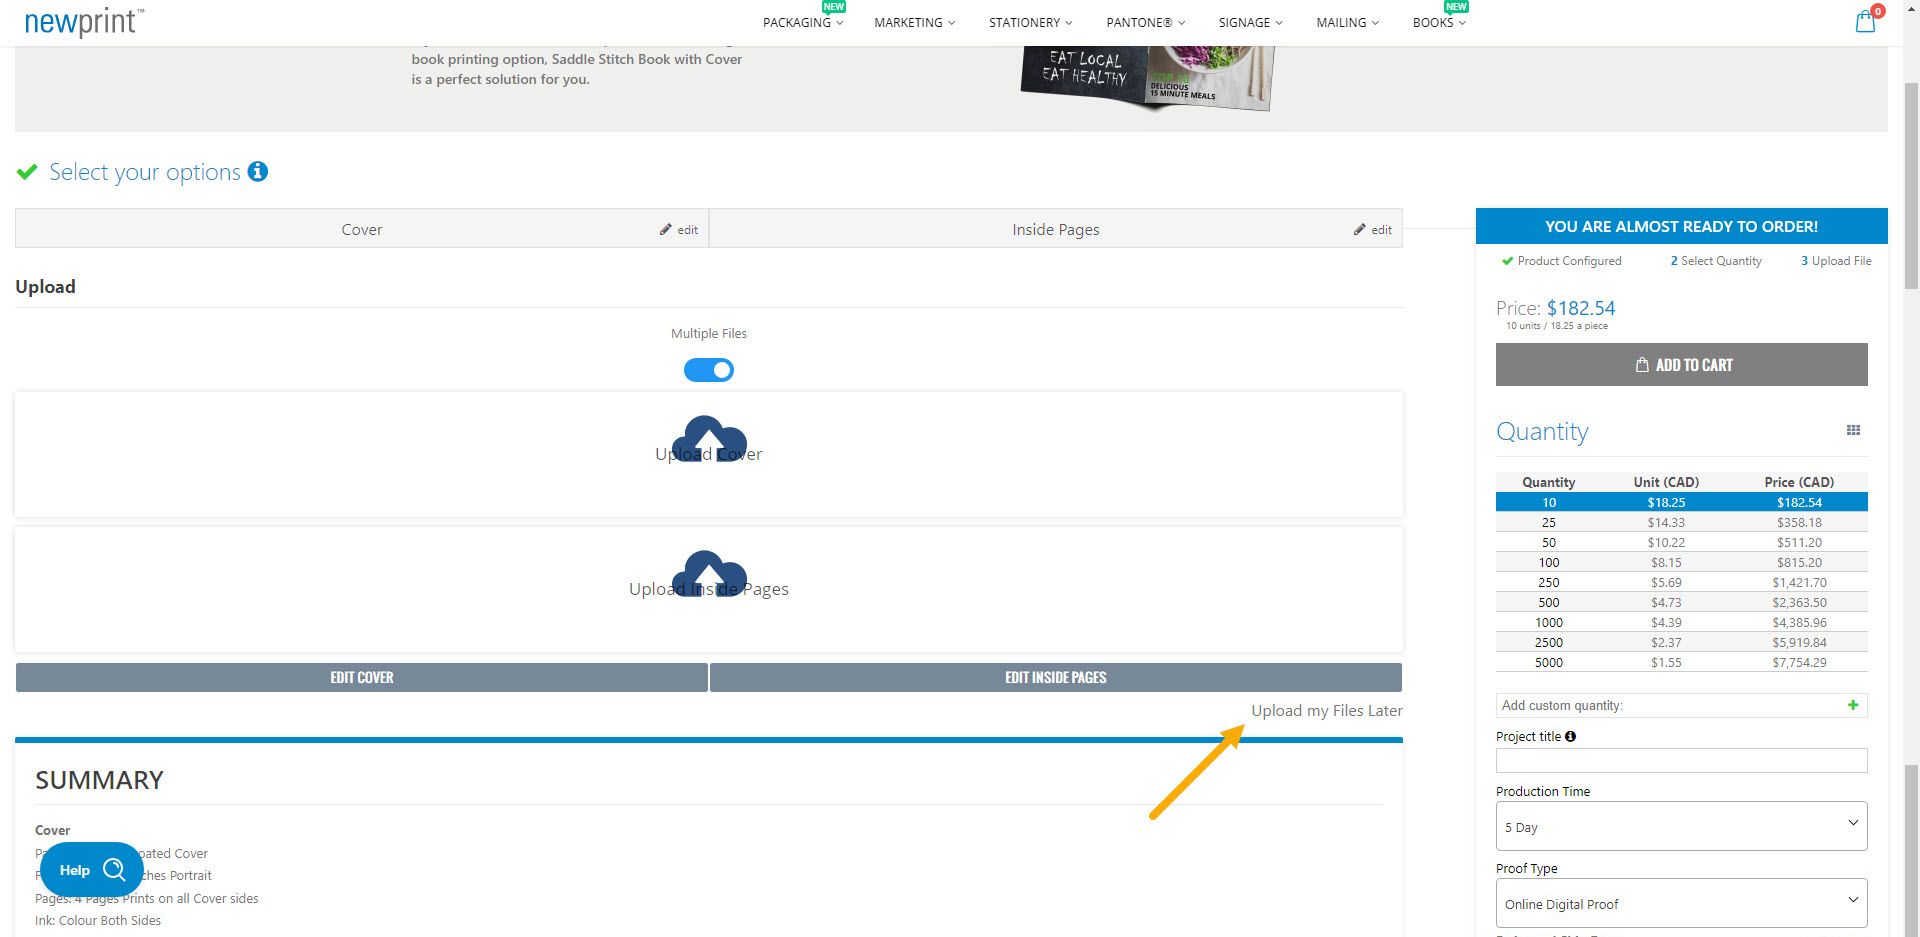
8. Click “Upload my files later”
You don’t have to upload your files to get the final price, with tax and shipping included. Simply choose to upload your files later and move to the next step.
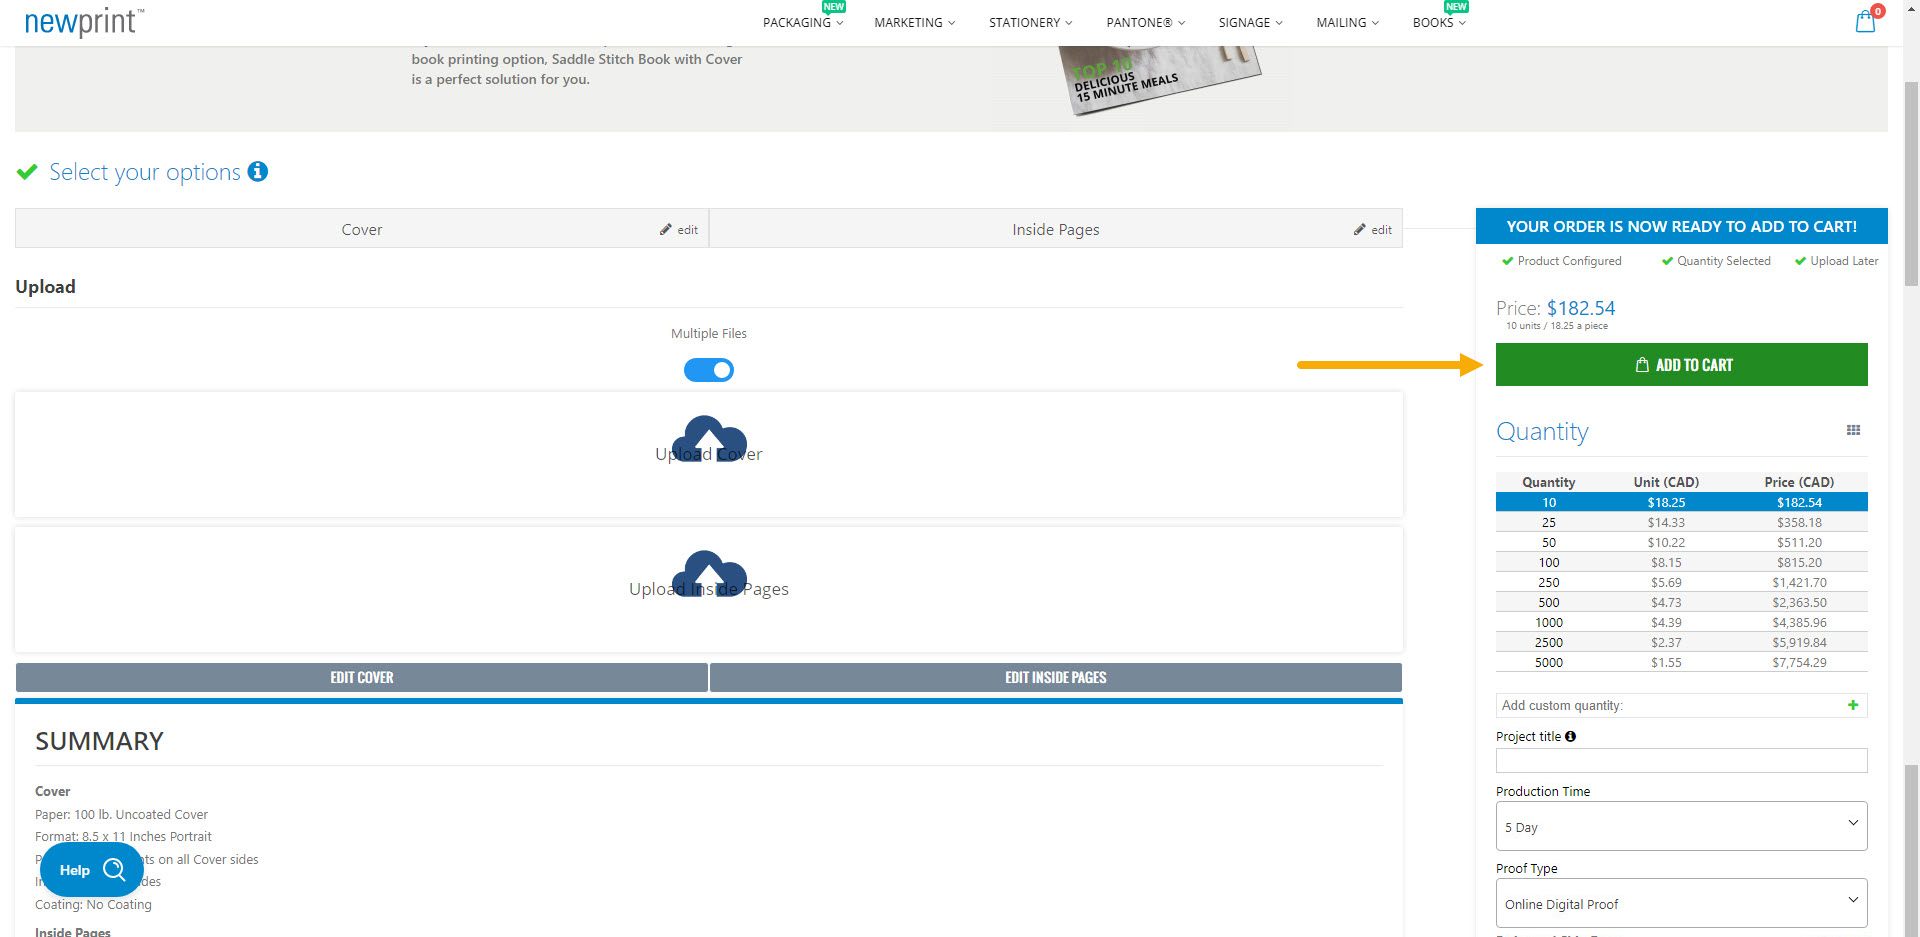
9. Add to cart
To get the full price for the selected product, you have to add it to cart. This will bring you to the final steps of the process, which are calculating the shipping cost and taxes.
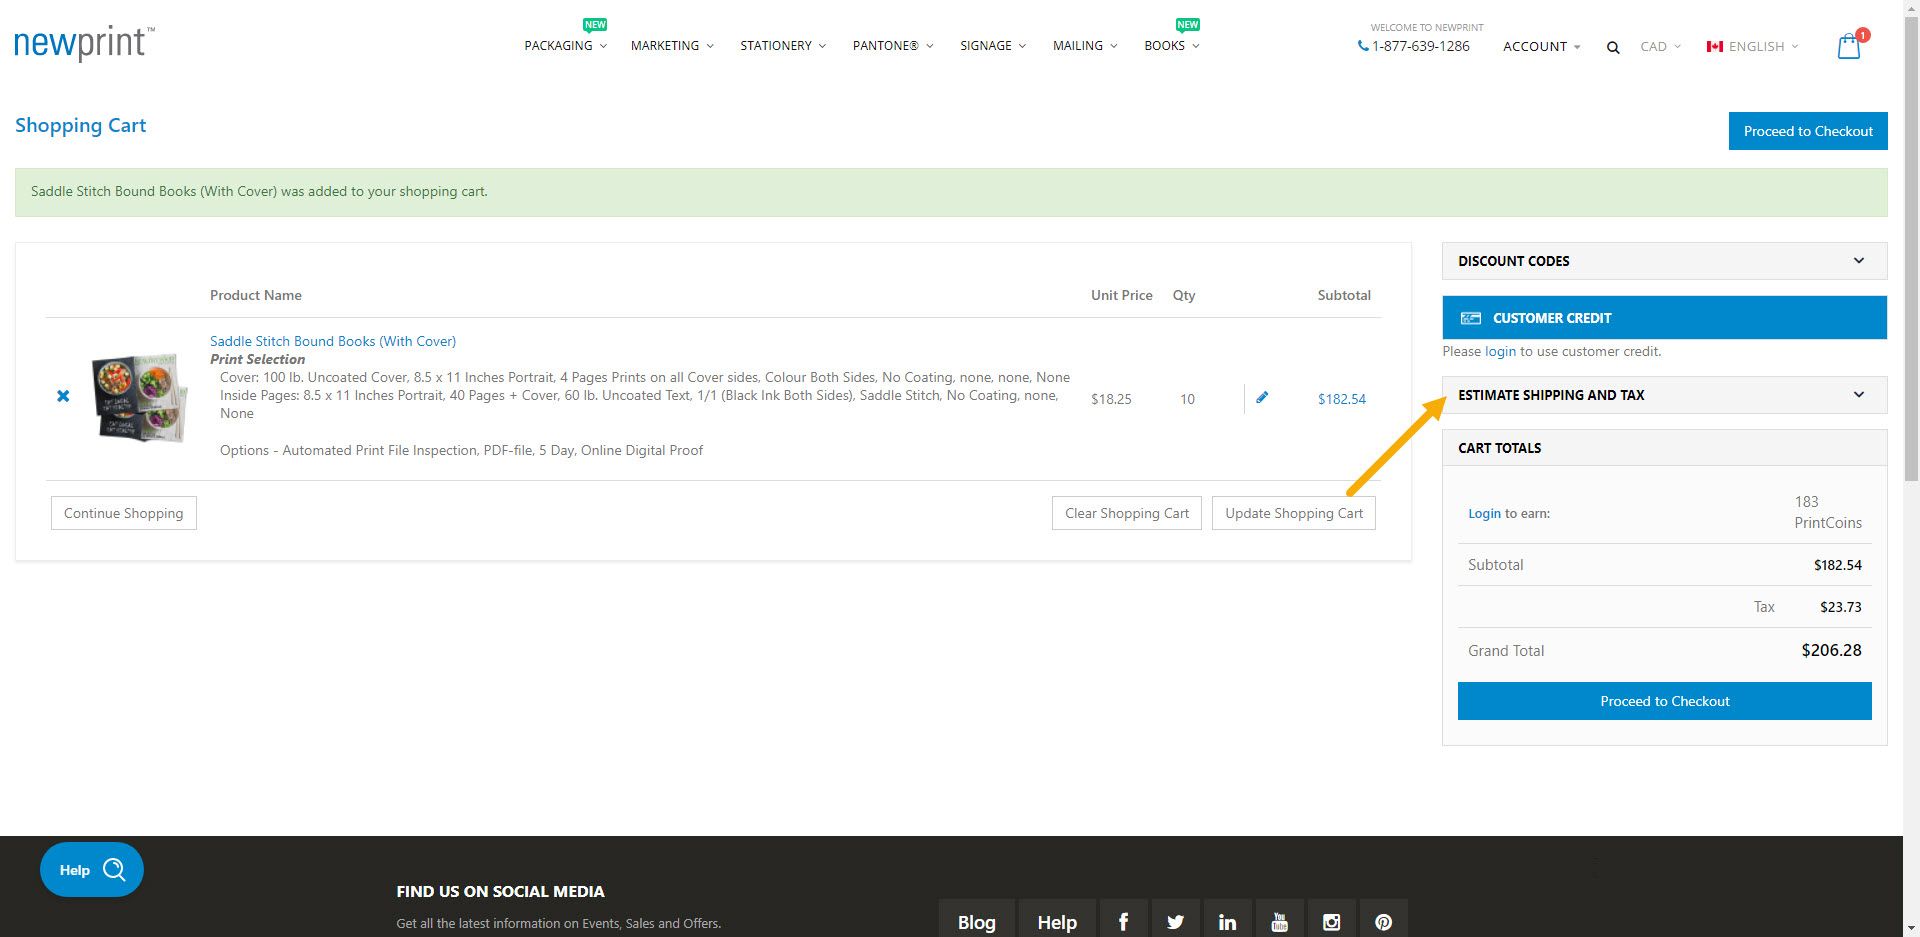
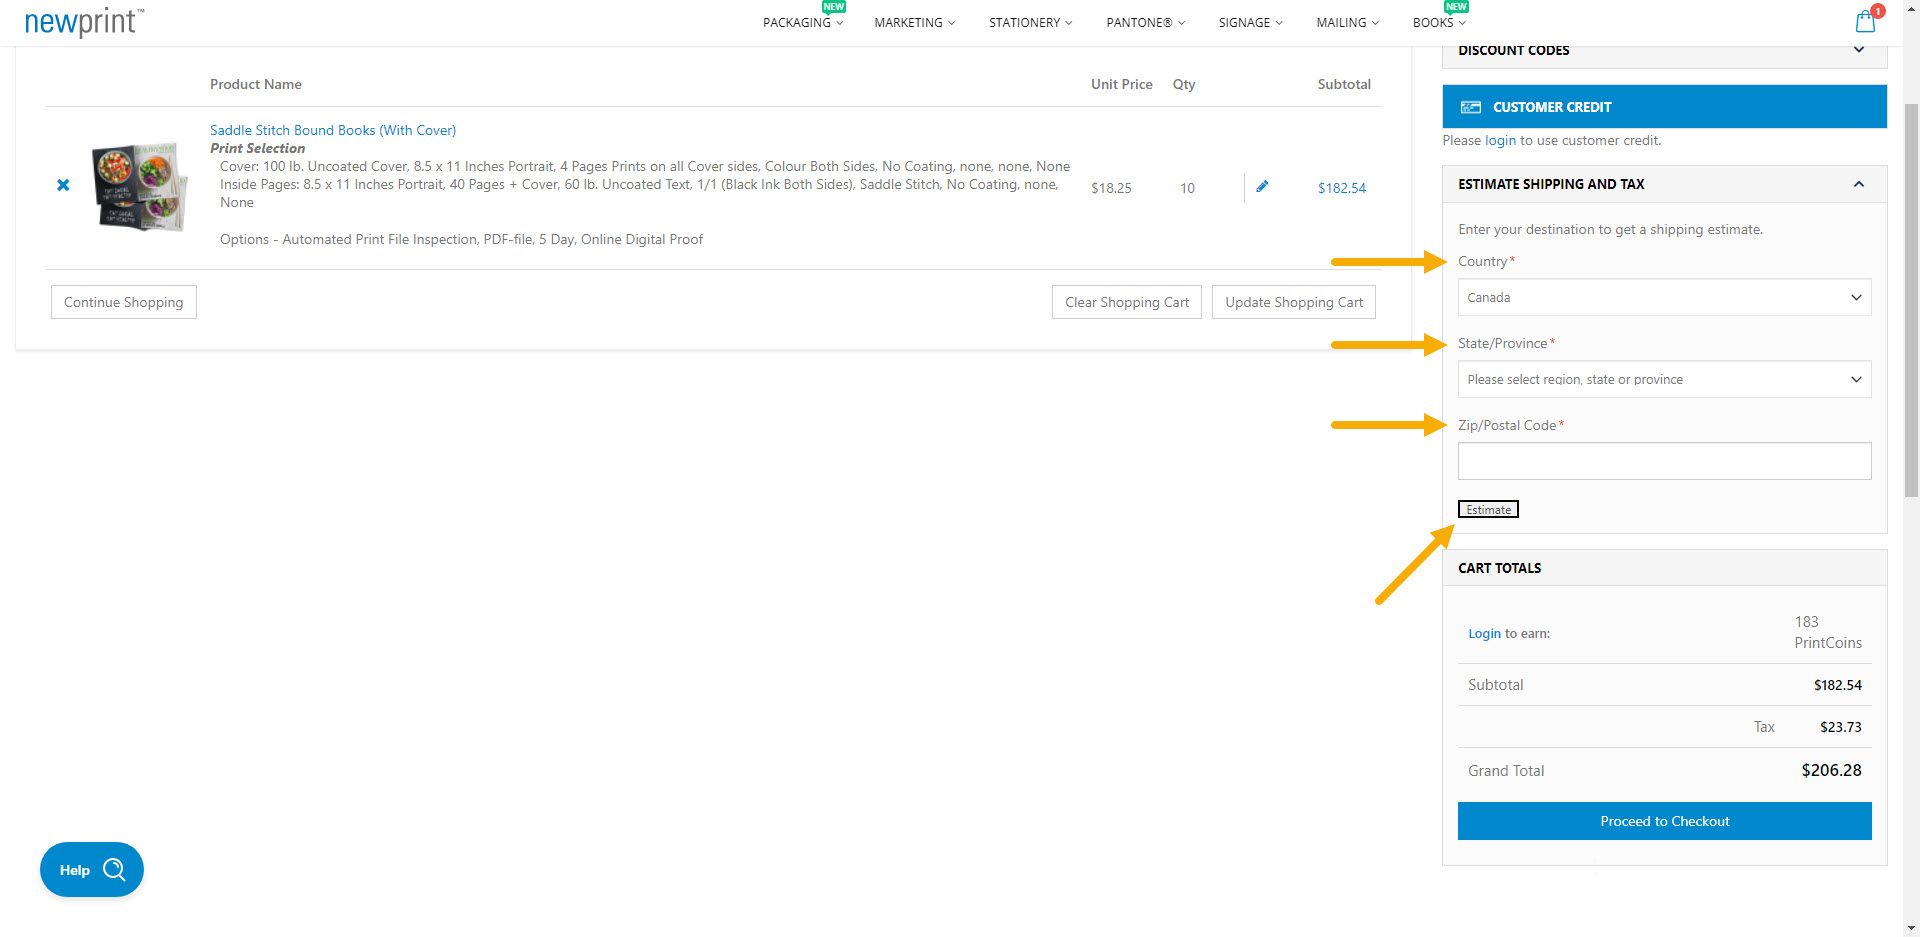
10. Estimate shipping and tax
When you click "estimate shipping and tax" you can add the shipping address and choose the shipping option needed to calculate the shipping cost.
11. Choose shipping destination
In this step, you can select the country, state/province, and ZIP code. After you have entered the information, you can click the “estimate” button.
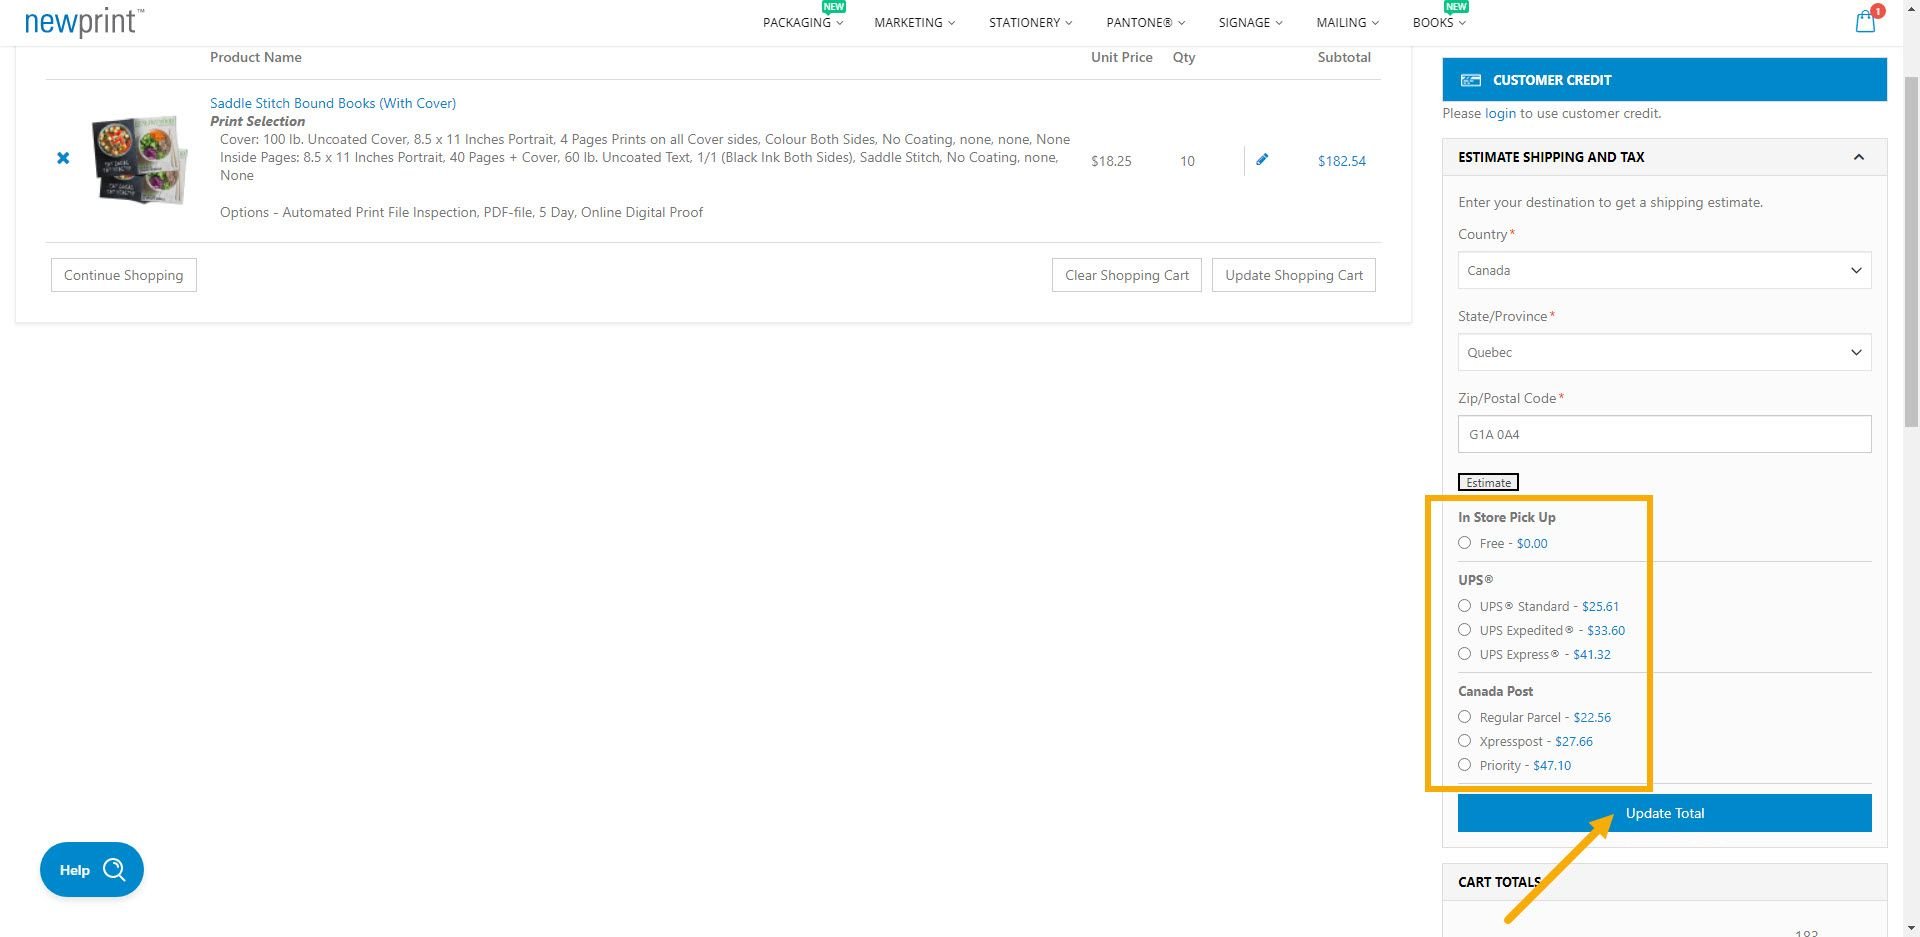
12. Choose shipping method
You will have prices next to every available shipping method, which allows you to choose the best one based both on the carrier and the price. After making your choice, click “update total”.
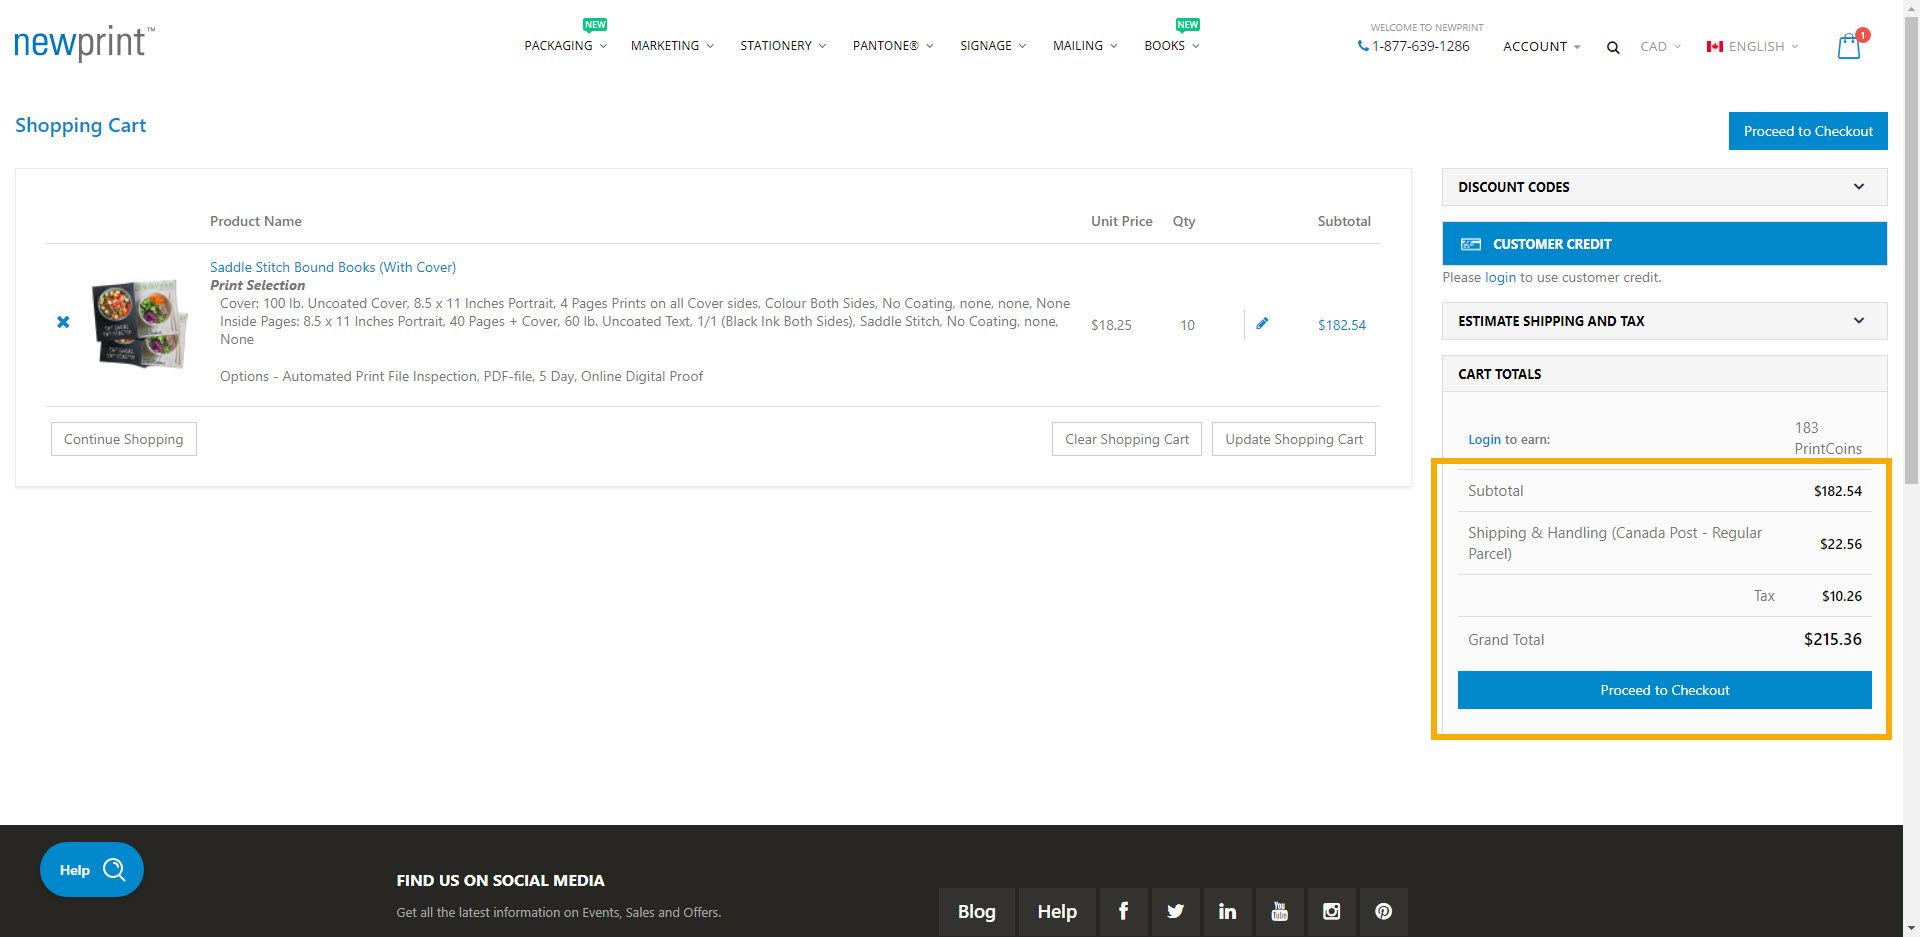
At this point you will get the full price for the product you selected, with shipping and tax included.
Our price calculator is a great tool that can help you get an online printing quote, see what printing options are available and what the price differences are between different options and quantities. And all of that is happening in real time. We wanted to be as detailed as possible in explaining every step of the process, but the truth is it’s a very straightforward process that only takes a few minutes.
